
We can make technology accessible!
Welcome To Netgear
Extender Setup
How to install a new extender setup?
- Plugin the New WiFi Range Extender to a socket.
- Turn on the laptop and open a web browser.
- Type mywifiext.net link in the address bar.
- Use an email or password to create an account.
- Once done, mywifiext.net login page will be displayed on the screen.
- Choose the network of the router.
- Fill in the password and click on the Continue button.
- It will open the Genie Smart Setup page.
- Create a secure connection between WiFi-supported smart devices and the extender network.
- Finally, click on the Finish button.
Steps For Mywifiext Extender Login
Marking into the extender’s game plan site is basic and you can do it with no issue. The extender’s default capabilities are given in the customer manual with the help of which you can log in to the site. See for steps to log in underneath–
- Spot the extender near the switch
- Check whether the Power LED is lit up
- Check your web affiliation if it’s working outstandingly enough
- Guarantee that the web program that you are using is invigorated to the latest variation
- Presently open a site. In case one doesn’t work considering a program issue you can endeavor another regardless of the way that the wifi extender supports a wide scope of projects
- Next, go to the area bar and type the site address http://mywifiext.net
- When you cross the page you will see two options there to Extender Login
- One option is of marking in the game plan site by filling in the default affirmations and the other is of making a record
- Next, you need to fill in the default username and password in the given fields after the mywifiext.net page
- That is about it, you will be taken to the arrangement page in case you entered the correct spellings and everything turns out positively.
Extender Login is Working or not?
The mywifiext wifi goes extender has various signs that show up if it has adequately organized and working or not. There are LED lights on the extender that shows up if it’s on and working, the framework name also that appears after the extender is plan viably shows it has related and is in working condition. You can see the once-over underneath –
- In the event like wn3000rpv is working you will see the solid green power LED turned on
- The lift and addition in wifi signal quality and speed will confirm that the Extender is working
- On the off chance that the extender orchestrate SSID appears in the exhibited framework show, it suggests the extender is readied
- On the off chance that the wifi-enabled devices are partner with the extender and working outstandingly then it shows extender is working properly
- On the off chance that the no man’s properties no longer remain as they were earlier and you can see strong wifi signs and system in those regions then your wifi run extender is working in the right way
- The firmware of the extender mywifiext.net setup page isn’t revived it won’t work
Net_gear Genie App Login
After Netgear Genie download Windows 10 completes, open the app. The Netgear Genie Windows 10 app is used to access router settings, change router username and password, set up a new extender, change network settings to name a few. For Netgear Genie for Windows 10 setup, open a browser on your computer and log in to 192.168.1.1 IP address. Doing so will open the Netgear Genie Login page which asks for login credentials. Enter the default user ID (UID) and password in the given fields and proceed further with the Netgear smart genie setup.
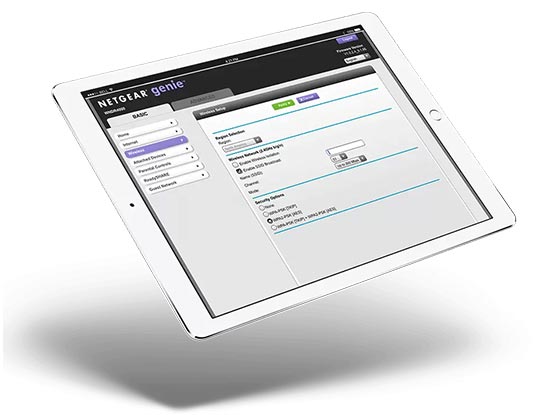
The Netgear Genie Windows 10 app is a simple method to oversee, screen, and repair your home system – from the palm of your hand. While on your home system, the Netgear genie app enables you to get to all the cool highlights on your switch with your cell phone. This feature is also available if you have installed Netgear Genie for Windows 10. You can access these settings utilizing the Netgear genie setup wizard: router login, remote settings, controls, visitor access, activity metering, MyMedia, and that’s just the beginning. All you require is your tablet or cell phone and the Netgear Genie app. Easily control your home system through the Netgear smart genie setup.
You need to follow the 4 basic steps to access your router through Netgear Genie Windows 10 App:
- Complete the Netgear Genie download Windows 10 PC or smartphone.
- Install the Netgear Genie app successfully.
- Log in to your router using Netgear genie login credentials through the mobile app.
Genie login via Netgear Genie for PC is very easy when it comes to setting up your router, routerlogin.net setup, changing username and password, or making changes to your router on a regular basis.
WiFi Range Extender N300 Setup
The mywifiext In the event that you need to stretch out your remote sign to arrive at places that have a frail sign to no-flag by any stretch of the imagination. The WN3000RPv3 has a WPS include which permits you to handily interface with gadgets with the WPS ability without expecting to type the remote secret word or run the arrangement wizard.
- Spot N300 or wn3000rp in a similar room as the WiFi Router.
- Ensure you have a live web association originating from the principal switch. Additionally, ensure that the switch is WPS able.
- Attachment the N300 or wn3000rp into an electrical outlet and sit tight for the Power LED Image to become strong. On the off chance that it doesn’t turn ON, press the On/Off catch as an afterthought board of the extender.
- Press and hold the WPS button for around 2 seconds as an afterthought board of the extender. The WPS LED Image will begin to flicker.
- Inside 2 minutes, press the WPS button on your switch.
- The WPS LED Imageon the Extender should go to strong green and the Router Link LED Image should additionally turn strong green to tell you that your extender associated with your primary system
On Connecting The Extender To Wi-Fi Network, Entered The Right Password, But It Is Not Working, Why?
Probably, you have entered the right password, once you can cross-check the SSID password on your extender label. Moreover, bring your extender nearer to the router for fast configuration. In case, you are using the WEP method, then check the password should be entered in the correct column.
Forget Login Email Id And Password – How To Troubleshoot?
Once you have reached the mywifiext.net login page, there you will see USERNAME & PASSWORD HELP where you can go with the security options. The appropriate solution to this problem is restoring the default factory settings. Again access www.mywifiext.net.
The New Extender Setup will be displayed, you will click on this New Extender Setup button.
How To Restore The Range Extender To Its Factory Default Settings?
To restore the range extender, you need to long-press the Reset button for at least 5 seconds with the help of any sharp pin or clip. Wait for some time till the extender reboots. When you again go for the mywifiext Net, use the default details as given in the instruction booklet.
Unable To See The Netgear Installation Assistant When Connecting To Netgear_EXT?
• Check your device should be set up to the DHCP.
• Check the LED of your device should convert into the green stable.
• Use the valid IP address that is 192.168.1.250
• If you are going to use mywifiext.net. Once check, it should be spelled correctly.
Features of Netgear New Extender Setup
1. We can do Netgear New Extender Setup in two different ways.
(a). Use As Extender Mode.
(b). Use as Access Point mode.
2. Completely tweak settings by login to Netgear – Extender Setup whenever.
3. Share files across your WiFi of Netgear – Extender network.
4. Offer a USB printer on the WiFi of Netgear New Extender Setup.
5. When you complete Netgear Extender Setup, associate any of your Ethernet empowered gadgets with Netgear – Extender and you can get to web on that gadgets by means of Ethernet link as it were. (discretionary)
6. Some of New Extender Setup models work with Fast path innovation to support WiFi or to Stream HD recordings. (discretionary)
7. After Netgear – Extender Setup we can log in to Extender settings and tweak the settings like channel impedance, signal quality and security type.
8. We keep updating Netgear Extender Setup firmware’s setting by OTA setting which can be set manually also after completing Netgear – Extender setup.
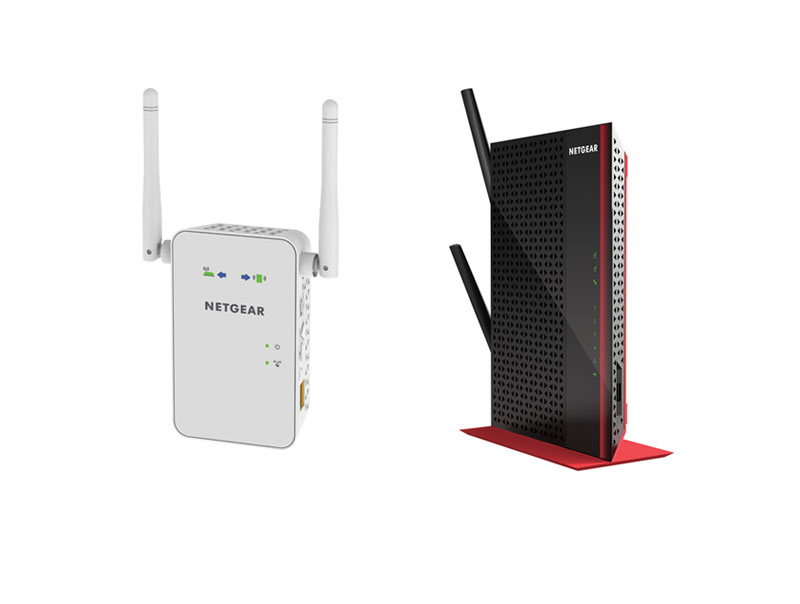
All Types of Extenders Models
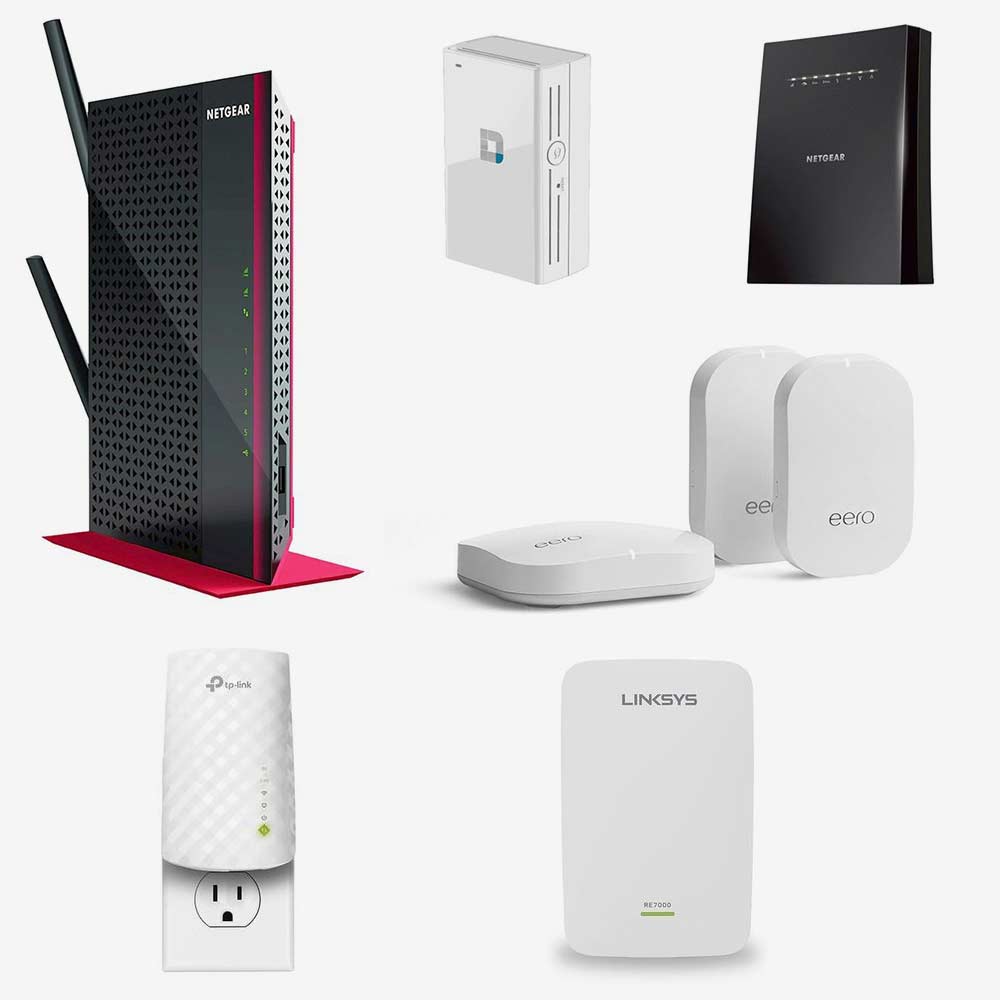
- AC 750 WiFi Range Extender
- AC1200 WiFi Range Extender
- N300 WiFi Range Extender
- N600 WiFi Range Extender
- AC1750 WiFi Range Extender (EX6250)
- AC1900 WiFi Range Extender (EX7000)
- AC2200 WiFi Range Extender
- AC2200 Mesh WiFi Range Extender (EX7300)
- AC1900 Mesh WiFi Range Extender (EX6400)
- AC1700 WiFi Range Extender
- AC1200 WiFi Range Extender
- AX6000 WiFi Range Extender (EAX80)
- AX1800 WiFi Range Extender (EAX20)
- AC3000 WiFi Range Extender (EX8000)
WiFi Range Extender N300 Setup
The mywifiext In the event that you need to stretch out your remote sign to arrive at places that have a frail sign to no-flag by any stretch of the imagination. The WN3000RPv3 has a WPS include which permits you to handily interface with gadgets with the WPS ability without expecting to type the remote secret word or run the arrangement wizard.
- Spot N300 or wn3000rp in a similar room as the WiFi Router.
- Ensure you have a live web association originating from the principal switch. Additionally, ensure that the switch is WPS able.
- Attachment the N300 or wn3000rp into an electrical outlet and sit tight for the Power LED Image to become strong. On the off chance that it doesn’t turn ON, press the On/Off catch as an afterthought board of the extender.
- Press and hold the WPS button for around 2 seconds as an afterthought board of the extender. The WPS LED Image will begin to flicker.
- Inside 2 minutes, press the WPS button on your switch.
- The WPS LED Imageon the Extender should go to strong green and the Router Link LED Image should additionally turn strong green to tell you that your extender associated with your primary system
GOT ISSUE WITH Wifi EXTENDER SETUP or WITH MYWIFIEXT.NET PAGE
We can help you get your WiFi Extender setup really fast and fix your issue of not loading mywifiext.net page setup. Just Live Chat Now.
Services

Network Support & Maintenance
We can set up and keep up your business’s system, or help investigate and keep up your current system.
")
IT Support
We are accessible to talk with you or your staff when issues emerge with your product. This administration can be either distant or on location help.
")
Cloud Services & Data Management
We will work with you to set up the suitable cloud size and accessible assets for your business.
Netgear New Extender Setup Instructions Using a
Web Browser
1. Plugin the extender to an electrical attachment to begin your Netgear Extender Setup.
2. Sit tight for quite a while and let the your Extender Setup boot appropriately.
3. From that point onward, double tap on any internet browser like Google Chrome, Microsoft Edge or Safari.
4. When you are at Google then you have search for Netgear – Extender Setup.
5. Here you can see Netgear Extender Setup button.
6. Click Netgear Extender Setup to create a new account for Netgear and fill all the options correctly.
7. Once you correctly fill all the options then go next step and select the WiFi network which you want to extend.
8. In the next step, you have to enter the regular WiFi password correctly.
9. Once you enter the password and click on next button then it will take up to 2-3 minutes and you Netgear – Extender Setup is done and prepared to utilize.
10. Connect you other WiFi-enabled devices like your smartphones, TV, tablet, laptops and workstations to the all-inclusive system and work is finished.
Netgear New Extender Setup Instructions Using a WPS Button
Various steps those users have to follow while Netgear – Extender Setup is as listed below: –
1. Right off the bat, put Netgear Extender on the electrical plug and sit tight for power light turns strong green.
2. Discover the WPS button on both for New Extender Setup on Extender and Router/Modem. One thing ought to must remember that WPS strategy will work just in the event that both Router/Modem and Netgear – Extender Setup have a WPS button.
3. In the event that anybody of them won’t have a WPS button, at that point client needs to follow manual technique for the establishment of Netgear – Extender Setup utilizing Web Browser.
4. Simply press and discharge the WPS button for one an ideal opportunity for Netgear – Extender Setup on Netgear Extender. Promptly you will locate those different LEDs on Netgear – Extender begins squinting. This will continue for 2 minutes and you need to do likewise for your Router/Modem.
5. When all lights on Netgear Extender turned strong green this implies you are finished with Netgear Extender Setup and your Netgear Extender is fully operational and you can interface your different remote gadgets with the all-encompassing system.
Make it stick out.
Whatever it is, the manner in which you recount to your story online can have a significant effect.
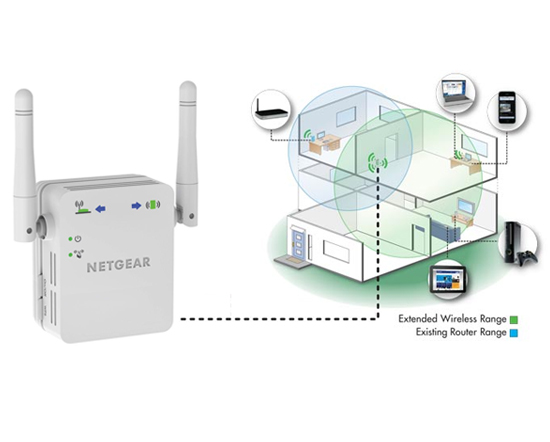
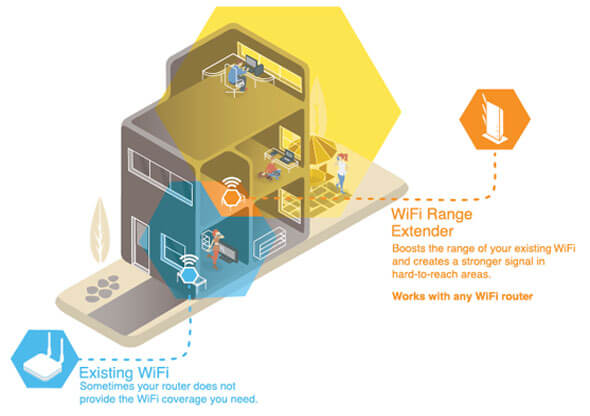
About Netgear – Extender Setup
Now and again, slow internet is the universe’s method of instructing you to go play outside. Different occasions, it’s the universe’s remorseless joke to pulverize your profitability. Here we give specialized help to all Netgear – Extender Setup for New and Used Extender related issues all through the world to investigate, fix, or simply endure a moderate internet association. Netgear New Extender Setup offers specialized help for the mywifiext.net administrator control. In the event that you need to increment or lift the WiFi go at your home or office then the Netgear – Extender Setup is the best. At the point when we are living in a major house up to a few story house then clear there are regions in your home where the scope of your WiFi Router/Modem can’t be reached. These regions are called dead spots. In these regions, you feel detached from the internet or Web. Thus, buy Netgear Extender, introduce it at your home by getting to the site Mywifiext.net and appreciate internet access at each side of your home.
We give specialized help to all Netgear New Extender Setup WiFi related issues all through the world for 24×7. Regardless of whether it is a little or huge endeavor. Netgear Extender Setup Support whose prime point is to progress in the direction of consumer loyalty.
We think conveying world-class administrations driven by flawlessness and experience. We offer anyplace, whenever specialized help for a fix, finding, establishment, and so on. Our specialists are profoundly prepared and ensured. Netgear – Extender Setup gives the best online WiFi Extender Support with 99.99% consumer loyalty. Our administration level understandings give 99.99% uptime and 90% of calls are replied in 10 seconds or less. Call us and get a 100% Satisfactory and lasting goal. You can discover better data about us from our site.
A major type of issues that our experts can help you fix efficiently and effectively are:
Extender Setup for the First Time
Can not log in to Mywifiext for setup
Extender connected but internet not working router issues after installing an extender
Internet Problem / Connectivity issues
Router / Modem Issues
How to install NETGEAR WiFi Range Extender as an access point?
You can use NETGEAR Extenders in two modes; one is extender mode and other is access point mode. The first mode usually expands the incoming signals from router in far corners of home or workplace, whereas the second mode makes extender work as a WiFi hotspot. Here are the instructions to install NETGEAR WiFi Range Extender as an access point:
Open an internet browser and go to www.mywifiext.net link. By default, the browser will take you to this link. But if it doesn’t open automatically, you may contact us.
Select the option: New Extender Setup. A popup will open. Fill in the information.
Genie Setup page will open. It will ask you about the mode in which you wish to set up your device.
Select the network type from the available options such as private, home network or public. Finally, set up new details such as name, password etc for network.
Now, you’re all set to use the extender as an access point. If you find any trouble while setting up a WiFi Range Extender in AP mode via mywifiext.net, feel free to take help from highly-experienced technicians at online chat.
Frequently Asked Questions
Solved your Question and Query Related to Extender Setup.