
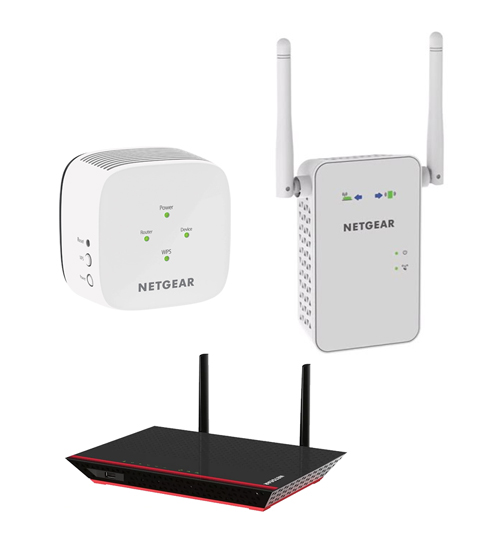
Product We Support
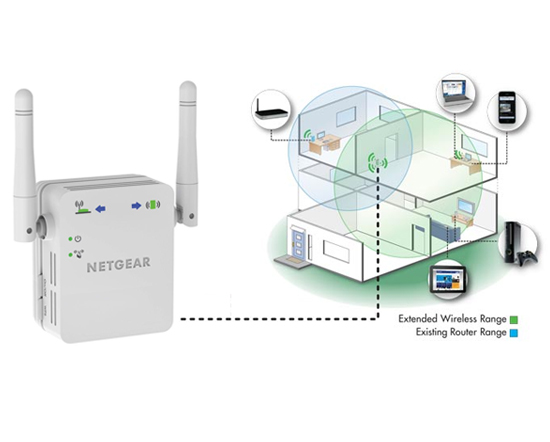
We support a variety of products to provide a complete Home WiFi solution.
How to install a new extender setup?
- Plugin the New WiFi Range Extender to a socket.
- Turn on the laptop and open a web browser.
- Type mywifiext.net link in the address bar.
- Use an email or password to create an account.
- Once done, mywifiext.net login page will be displayed on the screen.
- Choose the network of the router.
- Fill in the password and click on the Continue button.
- It will open the Genie Smart Setup page.
- Create a secure connection between WiFi-supported smart devices and the extender network.
- Finally, click on the Finish button.
For fast solution of your problem join us with assisting session
We can help you get your WiFi Extender setup really fast and fix your issue of not loading mywifiext.net page setup. Just Live Chat Now.
Extender Login is Working or not?
The mywifiext wifi goes extender has various signs that show up if it has adequately organized and working or not. There are LED lights on the extender that shows up if it’s on and working, the framework name also that appears after the extender is plan viably shows it has related and is in working condition. You can see the once-over underneath –
- In the event like wn3000rpv is working you will see the solid green power LED turned on
- The lift and addition in wifi signal quality and speed will confirm that the Extender is working
- On the off chance that the extender orchestrate SSID appears in the exhibited framework show, it suggests the extender is readied
- On the off chance that the wifi-enabled devices are partner with the extender and working outstandingly then it shows extender is working properly
- On the off chance that the no man’s properties no longer remain as they were earlier and you can see strong wifi signs and system in those regions then your wifi run extender is working in the right way
- The firmware of the extender mywifiext.net setup page isn’t revived it won’t work
We Provide guidance with all Type of Model in your Router & Extender Setup
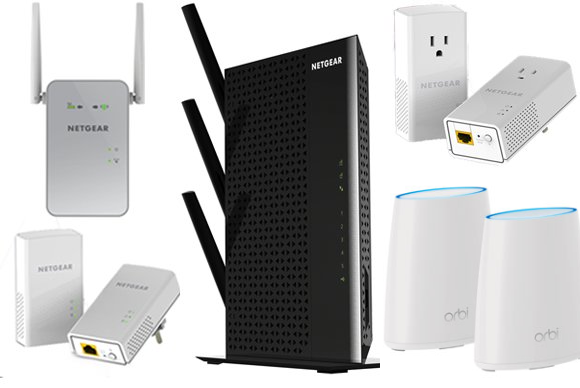

WIRELESS RANGE EXTENDER – wifi setup
- N300
- N600
- AC750
- AC1200
- AC1750
- AC2200
- AC3000
- Nighthawk X4 AC2200
- Nighthawk X4S – AC2600
- Nighthawk X4S DOCSIS
- Nighthawk AC1900
- Nighthawk X6 R8000-100PAS
- Nighthawk Ac2300
- Nighthawk X6S AC4000
- Nighthawk X6 – AC3200
- Orbi RBK40 AC2200
- Orbi Pro – AC3000
- RBS50 Orbi Satellite
- Orbi Router 1-Pack Starter Kit AC3000
- Orbi Pro AC3000.
- AC750
- AC1200
- AC1600
- AC1750
- AC2100
- AC2300
- AC2400
- AC2600
- PL1000
- PL1010
- PL1200
- PLP2000
WiFi Range Extender N300 Setup
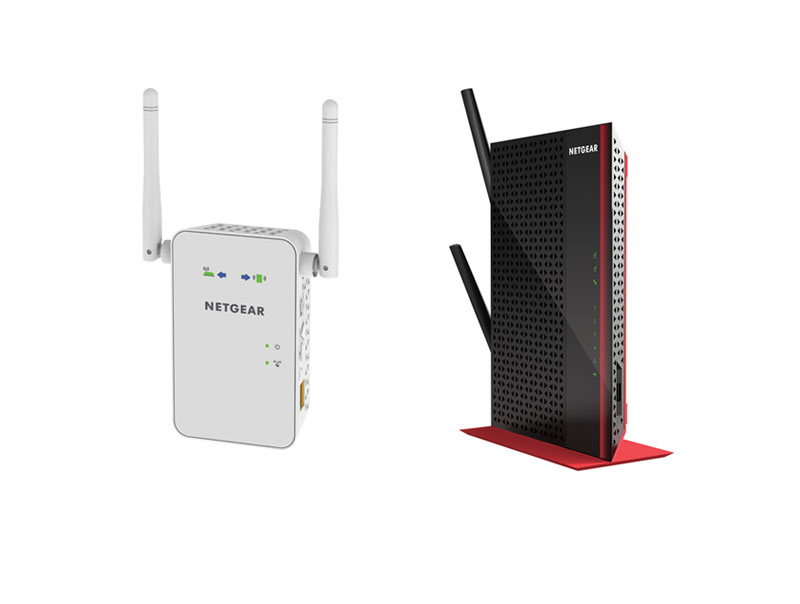
The mywifiext In the event that you need to stretch out your remote sign to arrive at places that have a frail sign to no-flag by any stretch of the imagination. The WN3000RPv3 has a WPS include which permits you to handily interface with gadgets with the WPS ability without expecting to type the remote secret word or run the arrangement wizard.
- Spot N300 or wn3000rp in a similar room as the WiFi Router.
- Ensure you have a live web association originating from the principal switch. Additionally, ensure that the switch is WPS able.
- Attachment the N300 or wn3000rp into an electrical outlet and sit tight for the Power LED Image to become strong. On the off chance that it doesn’t turn ON, press the On/Off catch as an afterthought board of the extender.
- Press and hold the WPS button for around 2 seconds as an afterthought board of the extender. The WPS LED Image will begin to flicker.
- Inside 2 minutes, press the WPS button on your switch.
- The WPS LED Imageon the Extender should go to strong green and the Router Link LED Image should additionally turn strong green to tell you that your extender associated with your primary system
Netgear router won’t connect routerlogin.net
Don’t worry if you experience your Netgear router won’t connect to the internet. As the issues are not permanent. Follow the steps below to connect it again to the basics:
- If you see your Netgear router won’t connect, make sure that the modem is working fine.
- If the modem is working fine, then check the Ethernet ports and connection between your router and modem. Make sure that the connection is not loose.
- Restart your router and check whether the internet connection is active or not. If it is not connecting, then reset the router.
- Press and hold the reset button at the back of the router.
- Hold for about 10 seconds. Once all your LED’s on the router start blinking, then release the button.
- Wait for a few minutes while your Netgear router gets back to the factory default settings.
- Now re-configure the Netgear router by the following setup process.

Netgear Range Extender Setup Manually (Using Ethernet Cable)
When you opt to connect the Range Extender Manually, you need an Ethernet cable to connect to your computer or respective device (Computer, Laptop, etc.) with the Extender. Fix an end of Ethernet cable to a computer LAN Port and connect another end to the LAN port of your Netgear Extender.
- When the Extender is connected well to the power outlet, it will indicate by lighting up its amber LED.
- In order to access the Netgear Range Extender web user interface, you need to open the main browser of your device and type http://mywifiext.net. In case it is not working then type 192.168.1.250.
- Perchance, you need to add a username and password that is ‘admin’ in a case sensitive by default. The Netgear Router details remain the default until you change it. In case you ever changed it then go with the new Password.
- The web interface will open and will show the processing to scan the Wifi network. (It will take time to scan, so you need to wait for some seconds).
- It will show the 2.4GHz band or 5GHz Wifi Network, you need to enter the wifi password and click on ‘Continue’
- Click on the Encryption Strength and select the 64 bit or 128 bit.
- Choose the radio button and select any corresponds key.
- Select the Radio button, Type Network WEP key, and click on ‘Continue’.
- Finally, it will show ‘My Wireless Devices are Connected to the Extender Network’ and click on ‘Continue’ to save the settings.
- When the Netgear Router and Extender are connected with each other, it will change the network name depending on your Netgear Extender Model. For example, your Exiting Network Name is: Netgear
- After connecting to the router the new Netgear wifi name will become Netgear_2GEXT or Netgear_5GEXT (as per your router model).
When you choose the wired connection, you have to keep your Netgear Extender with your connected device however the wireless connection allows you to keep your Netgear Extender to any a place and use it via wireless wifi connection.
GOT ISSUE WITH Wifi EXTENDER SETUP or WITH MYWIFIEXT.NET PAGE
We can help you get your WiFi Extender setup really fast and fix your issue of not loading mywifiext.net page setup. Just Live Chat Now.
Netgear Extender Setup Wireless Connection (WiFi)
However, the Netgear Wifi Range Extender enables the users to stay in touch with wifi signals regardless of the distance but for its initial Netgear Extender Setup, you have to keep your router nearby your router. Once the connection is established, you can go anywhere under the wifi range.
- Connect your Netgear Extender to the power outlet and hit the button to power on the Extender. Initially, its LED will blink but within some seconds, it will become solid amber.
- Access the main browser installed on your device and type www.mywifiext.net.
- It will open the New Extender Setup
- Confirm the details required to create Extender Account and click on Next.
- Select the Wifi Range Extender
- It will open the 2.4GHz Network or 5GHz network. You can select either one and type the password.
When the settings are saved, you will be successfully connected to Wifi Extender to improve the dead zone of your internet.
Netgear Extender Setup WPS Method
The easier process ever to connect your Extender to your Router is the WPS method. The only thing required to run this process is you need to follow the accurate method with speed.
When you power on your Router and Extender, clearly find the WPS button on your router and Extender too. Press and hold the WPS button of your Extender, its WPS LED will light up. Immediately, you need to press the WPS button on your Wireless Router.
Within some seconds the Extender will connect to your router. When both are connected, the Extender LED will turn into solid green as well as the 2.4GHz rate LED light up. If your router is responsive to the 5GHz band then it will connect to the 5GHz band automatically.
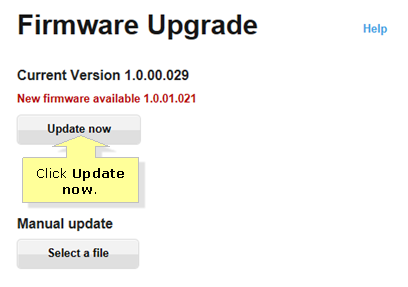
How to Update the Firmware of the Extender?
When you have to update your wifi range extender’s firmware, you need to do the same things you did earlier while configuring it. Those things are placing your extender in the same room as that of the router, the internet connection should be good and the web browser should be updated. When you have assured these things, then you can go on to follow the below-given steps
- After plugging in your extender and connecting it, open your device and launch a web browser
- The web browser should be updated.
- Type the site address www.mywifiext.net in the address bar of the web browser
- When you have accessed the web site you need to log in with the default credentials
- If you have changed the credentials in the settings earlier then login with the changed credentials
- When you are directed to the setup page you will be prompted to update the extender’s firmware automatically
- Click on the link provided and update the firmware of your extender
How to secure your home wireless network
Once your wifi access gets out into the world, it can be difficult to protect your home wireless network from intrusion. A serious risk is that an online criminal might exploit your poor Wi-fi security measures and “listen” to your traffic in order to retrieve sensitive information or take advantage of your network to launch malicious attacks.
Here are some simple but important tasks to improve the security of your network:
- Change the name of your default home network.
- Make sure you set a strong and unique password to secure your wireless network.
- Increase your Wi-Fi security by activating network encryption.
- Turn off the wireless home network when you’re not at home.
- Use a strong network administrator password to increase Wi-Fi security.
- Turn off network name broadcasting.
- Always keep your router’s software up-to-date.
- A firewall can help secure your Wi-fi network.
- Enhance protection for the devices most frequently connected to your home network.
- Keep your devices healthy.
- Set up a separate network for IoT devices.
- Safe wifi.
GOT ISSUE WITH Wifi EXTENDER SETUP or Secure Your Wifi Newtwork
We can help you get your WiFi Extender setup really fast and fix your issue of not loading mywifiext.net page setup. Just Live Chat Now.
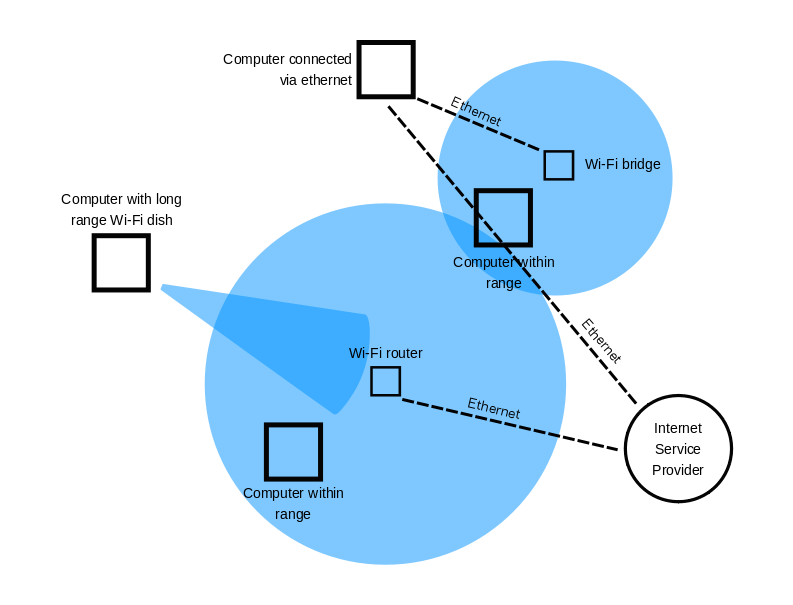
Connecting the Wi-Fi Range Extender
Once you have set the NET WiFi extender’s range, log in to the extender’s website to view and alter the settings.
If you’re not sure if you’ve set up and connected the WiFi range extender with your current WiFi network, go to the NET Support page and download the quick start guide for your model prior to proceeding.
Check that your model is listed in” Automatically tagged models” in the “This article applies to:” section. If you own a Mesh or Nighthawk Mesh WiFi Extender look up how I sign into the WiFi of my Mesh Extender or Nighthawk Mesh Extender.
To log into your WiFi range extender’s range:
- Open a web browser using your mobile or computer with a connection to the extender’s wireless network. Note: The extender and your router might be using different WiFi names for the network (SSIDs). Check that you’re connected to the extender’s network.
- If your router and extender have distinct WiFi name networks (SSIDs) then type www.mywifiext.net in the address box of your web browser.
- If both your router and extender are using identical WiFi internet names (SSID) enter http:/http:/ The address of the extension is” IP =”> (for instance, http://192.168.1.3) into the address field of your browser.
- For more information, visit How can I determine the Ip address for a gadget linked to my router?
- Click or tap Enter.
- A login page displays.
- Enter your admin username and password.
- Note User name may include an email.
- If you’ve forgotten your password and user name If you have forgotten your password, go to the Username and Password Assistance link.
- To reset your login details for a new login, refer to What do I need to do to perform an initial reset of my NET range extender?
- Click or tap login.
- The Status page shows.
- If your browser shows it with the menu icon Click tap or click it.
- The menu for extenders displays.
- Click Settings to see and modify the settings of the extender.
Frequently Asked Questions
Solved your Question and Query Related to Extender Setup.